John Hartman

John Hartman is a technical and scientific illustrator who seamlessly blends traditional media with 3D and digital techniques to create  images that are fresh and contemporary, yet warm and inviting. His work can be seen regularly in Fine Woodworking, Woodcraft, Fine Home Building and more. John agreed to answer a few questions about his work and career.

John Hartman - Paslode Nail Gun

What’s your background? How did you get started in technical illustration?

It’s a long story but here it is in a nut-shell. I have always been interested in drawing and painting. My early education was in fine art. I also found technical illustrations like those in Scientific American, Popular Mechanics and Fine Woodworking inspiring and they appealed to my interest in art, science and technology. Since my school days predated the personal computer, technical illustration was being created strictly by hand. As a student I was impatient, rebellious and seeing how fastidious hand drafting and airbrush painting was I decided to go another route and become a fine artist.

I found myself living in Brooklyn, working odd jobs to pay the rent. Being a starving artist wasn’t for me so I decided to learn a trade. I also had an interest in music as well as art so I re-educated myself as a piano technician. Fast forward a few decades and I am running my own business rebuilding grand pianos. Knowing of my art background the editor of the Piano Technician’s Journal, the trade magazine for people who tune and repair pianos, asked me to come on board as their illustrator. I spent the next six years teaching myself technical illustration. Starting with traditional hand methods and eventually developing digital techniques that emulate the handmade artwork I loved in my youth.

The pianos are now gone and I am working full time as a freelance illustrator. I’ve converted part of the piano shop into my studio, and have kept the woodworking shop as my man cave. I love this work and wish I would have started earlier. There’s a lesson in this somewhere.

John Hartman - Water Tank

You work in a range of styles and subject matter. How do you choose the right aesthetic for a project?

Well I think the right aesthetic is the one that gets the job done and also appeals to me personally. I have never hidden the fact that I work digitally but my personal taste in art and illustration is rooted in traditional analog techniques. So generally I don’t want my work to look like it popped out of a computer program. I think in my case what comes off as different styles is really a result of my penchant for experimenting with a wide range of tools and methods. Typically I may blend together 3D rendering with hand drawing and a little vector work as well. I love learning new software and trying to come up with different ways to create illustrations. Sometimes I attempt to emulate a particular analogue drawing style, the results vary but I always learn something new. For me, it’s more of a challenge to stay consistent and on track. Except for my personal taste, experience, and craftsmanship the style chooses me rather than the other way around.

As you noted, I enjoy working on different subjects as well; there is nothing better than being handed a unique assignment, and doing the research can be fun as well. But I have never consciously linked a style to a particular subject except in the case of my work with Fine Woodworking Magazine where there is an established style. I do try to be consistent within a project and if the art director points me in a particular direction stylistically I make every effort to accommodate. In addition, with art directors I know well I will often discuss style issues to better integrate the illustration with the page design or create something a little different than usual. Some of my most successful work stems from collaboration with a talented art director.

John Hartman - Bench

What challenges have you faced in your career? What opportunities do you see for the future?

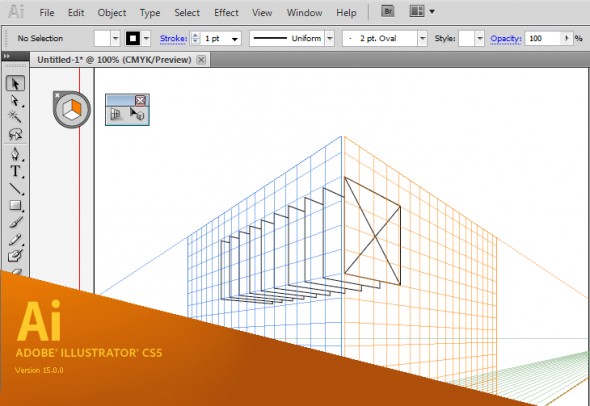
Projects that are complex or those that require a new skill to pull off, or have a very tight deadline have kept me awake at night. Over time I have learned to expect these sorts of challenges and I find myself looking forward to difficult projects. One challenge we technical illustrators face is keeping up with ever evolving technology, requiring practice and self education. I think learning new software is vital to staying competitive. Also I find I need to brush up on core software I already know like Photoshop and Illustrator. Since software is doing more of the heavy lifting I find I need to practice my analog skills and foundation knowledge like perspective just to keep from losing this valuable tool set.

What I see on the horizon for technical illustrators is the increased use of 3D animation. On-line video is becoming the leading media for news, education and entertainment. It may take some time but eventually publishers, advertizing agencies and businesses will seek out talented illustrators to create information based animations.

Do you have any advice for new illustrators or students?

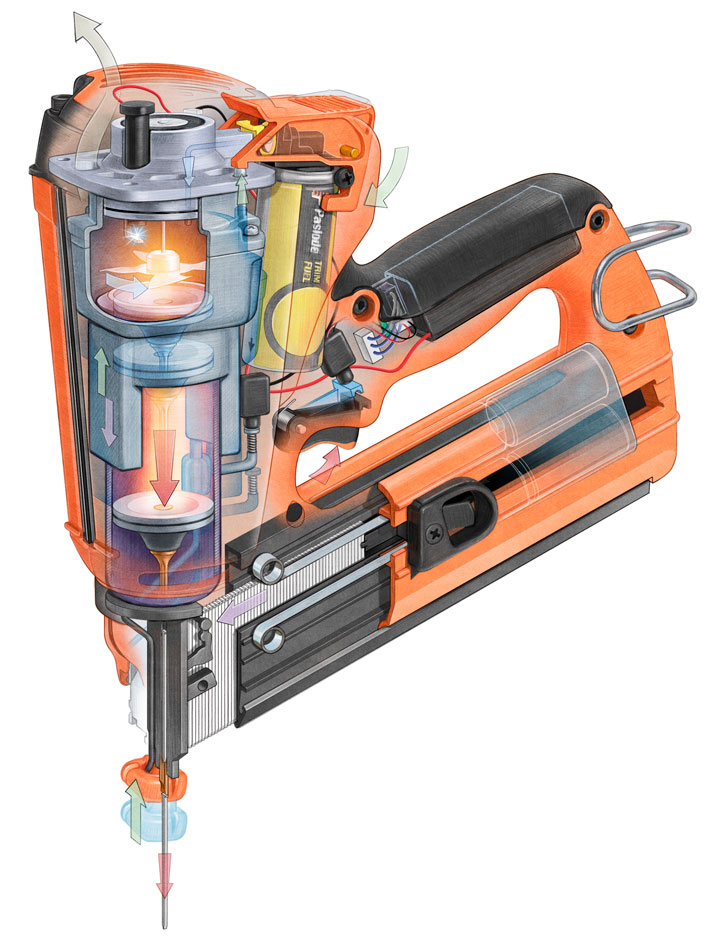
Technical illustration is a broad field of study. It covers any illustration assignment that needs to show the viewer how something functions or how parts are interrelated. At its heart is clarity and precision, and consequently it requires more discipline and knowledge. I believe students need to work longer and harder to gain the skills needed. New illustrators and students need to know it’s going to take passion and dedication to be successful in this field.

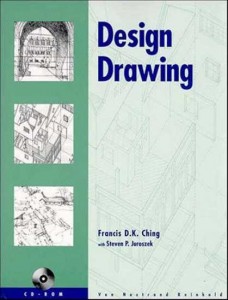
Technical illustrators need to be able to draw well. This means being able to accurately depict the world around us with line, tone and color. Don’t expect to gain this by attending a few classes in school, it will take a lifetime of learning, and continued practice to maintain. You need to study perspective, how to render light and shade as well as color theory. Don’t expect computer programs to do this for you. If you wish to include the figure in your work you will need to study artistic anatomy as well.

Working as a technical illustrator is not a passive act, you are expected to research and understand the topics you are given. In addition you will need to solve the many technical and design issues that arise with each assignment. The artistic quality of your work is up to you. Hopefully you have a passion for fine art and can bring flair to your work that is attractive. I believe that technical illustration should be beautiful as well as useful.

John Hartman - Air-Conditioning-System


See more at Hartman Illustration.

Adobe Updates Mobile App Lineup

Drawing made with Adobe Illustrator Line on iPad

Drawing made with Adobe Illustrator Line on iPad

At its Adobe MAX conference today, the company has announced new features for its iPhone and iPad app offering. Potentially of interest to tech illustrators are:

  • Illustrator Line Create vector sketches freehand or with the help of a selection of shape guides and axonometric, isometric, or two-point perspective grids. Work can be brought into Illustrator CC or Photoshop CC via Creative Cloud.  [Video]
  • Shape CC Auto-traces photos captured with your device’s camera, creating vector artwork for use in Photoshop CC, Illustrator CC or Illustrator Draw. [Video]
  • Color CC Generate color palettes from photos, then mix, edit and sync via Adobe Color service. [Video]

All apps are free, but require a registration for a free Creative Cloud membership.

Do you use mobile apps in your creative process? Does professional work require a desktop? Sound off in the comments!

Some Perspective on Perspective Drawing

What we see versus what we think we see

If you’re struggling to learn perspective drawing, or even if you use it every day but never thought about it too deeply, I suggest you read Live Perspective: A New Approach to Depth in Drawing over on TutsPlus.

It starts off with the fundamentals of sight, perception and experience, and goes on to tie together phenomenon such as distortion, parallax, peripheral vision, depth of field and the limits of linear perspective into a sort of unified idea about visually communicating three dimensional space.

Autodesk Sketchbook Pro 7

Sketchbook Pro has been around for almost 10 years and is popular amongst comic, character and concept artists, but its latest release has a toolset that might be of interest to technical illustrators. While it’s a pixel-based application, as opposed to vector, I think it could still be handy for sketching roughs and even looser-styled finals.

httpvh://www.youtube.com/watch?v=r96G15n08Y4

Perspective Guides

These guides let you quickly and intuitively lay down lines converging on one, two, three or even five vanishing points. The tool gives you constant feedback as to where your cursor is positioned in space, and when you draw, it constrains your line to the appropriate heading. This looks like it would be very useful in the planning stages of an illustration, enabling you to quickly sketch in a variety perspectives.

Ruler & French Curves

The Ruler tool allows you to stroke a straight line in any direction. This works similar to Photoshop’s constrain modifier (Shift key) while using the Brush tool, but works in any direction. The French Curves shows an overlay of a variety of arcs and curves which can also be used to constrain a brush stroke. These tools would help add detail to a sketch once you’ve established the overall perspective.

Ellipse

Photoshop and Illustrator may have ellipse tools, but the one in Sketchbook Pro includes a minor axis guideline and displays the rotation and degree of the ellipse for added precision.

Everything Else

Other notable tools include the Symmetry mode that mirrors your drawing along a vertical and/or horizontal axis, Free Transform which is handy for distorting textures, patterns, shadows or repeating features into perspective, and Flipbook which enables frame-by-frame animation.

httpvh://www.youtube.com/watch?v=VgU61K2cjuc

httpvh://www.youtube.com/watch?v=ngLhGySVYLQ

Sketchbook Pro is US $65, or via subscription for $25/year or $2.99/mo.

Illustrator CS5 – Perspective Grid

Adobe Illustrator CS5 - Perspective Grid

Adobe Illustrator CS5 - Perspective Grid

It’s that time of the year when we’re blessed/cursed with another release of Adobe’s Creative Suite software and the inevitable question of whether or not to upgrade. For those of you teetering on the edge, here’s the push you may need to break out the credit card.

Brand new to  Illustrator CS5 is an embedded perspective grid and all the accompanying tools you’ll need to streamline your perspective drawing work flow. I was lucky to be part of the beta testing for this tool, along with fellow TechnicalIllustrators.org contributor Cody Walker, and I have to say I’m really pleased with how it turned out.

Anil Ahuja of Adobe has posted a tutorial that shows most of the features of the perspective grid. Have a look at it here. Check out the PDF at the bottom – it goes into more detail regarding how the tools are used. A sample of the file is there as well, but you’ll need a copy of CS5 to open it.

The grids come in default one-point, two-point and three-point perspectives, but you can tweak everything – vanishing points, origin, grid size, the height of the horizon and much more. When the grid is active, the shape tools all conform to a plane (chosen by you with the 1, 2 and 3 keys). Once objects are on the grid they can be copied and moved perpendicularly through the space as well.

However, for me the true power of this tools comes from the ability to transfer flat orthographic drawings directly to the grid. The only drawback is that raster images are not supported – only vector shapes can be applied to the grid.

The new tools will not obsolete or undermine our abilities as technical illustrators. Rather, as Anil states:

“…please understand that Perspective Drawing in Adobe Illustrator CS5 is NOT a 3-D environment. It is an extension of traditional perspective drawing technique. An artist will have a capability to define a perspective grid (one-point, two-point or three point), define a relative scale, move the grid planes and draw objects directly in perspective or attach flat art onto them by dragging with the new Perspective Selection tool.”

Also, all the old quirks of working with a grid are still there – so don’t throw out your techie toolkit just yet!

I highly recommend downloading and trying out the new version of Adobe Illustrator cs5. A 30-day trial is available on Adobe’s site.

Design Drawing by Francis Ching

D. K. Ching - Design Drawing

Francis D. K. Ching - Design Drawing

Basic drawing techniques are an essential part of the technical illustrator’s skill toolbox. Design Drawing by Francis D.K. Ching proves to be an invaluable resource; whether it be for perspective drawing, isometrics, or orthographics. It offers a wide range of lessons that slowly allow you to build upon your skills, starting with the theory behind representing three dimensional objects on a two dimensional surface.

As an all-encompassing drawing resource goes, this book has it all. It covers the details of perspective drawing right from the planning stage, explaining how to best represent your object, what angle to choose, how to draw from plan drawings, and so on. Even if you already have a good handle on drawing in perspective, this book still comes in handy as a quick go-to book for those times you get stuck.