SubScribe Illustrator Plugin

httpvh://www.youtube.com/watch?v=D5lk-XKShhM

Astute Graphics has done it again. In what seems like a quest to put all of Adobe Illustrator’s native tools to shame, they’ve released a new plugin suite called SubScribe. Included are tools for drawing circles based on 2 or 3 points, connecting and straightening lines, drawing arcs, rotating and orienting artwork and drawing tangents and perpendicular paths (as shown in the video above).

Time to reassign some hotkeys.

SubScribe is free to all Astute Graphics customers.

Astute Graphics VectorScribe

It’s been a great summer break, but now it’s back-to-school here at TechnicalIllustrators.org.

I thought I’d share what I’ve learned using Astute Graphics’ VectorScribe plugin for Adobe Illustrator (previously) over the past few months. I’ve put together a bit of a demo video highlighting some key features of the suite that I’ve found helpful.

httpvh://www.youtube.com/watch?v=AydOgXNnQjs

This only scratches the surface—As mentioned in the video, be sure to check out Astute’s video tutorials to learn about all the features in detail. I think this package is a great, feature-rich and intuitive extension to Illustrator’s toolkit.

If you’re using VectorScribe or have tried the demo, let me know your thoughts in the comments!

Vector Scribe Illustrator Plugin

httpvh://www.youtube.com/watch?v=Y1TEqhiyZ3k

I’m excited to introduce to you a new plugin suite for Adobe Illustrator, VectorScribe by Astute Graphics.

VectorScribe fills the gaps in Illustrator’s toolbox. These tools give you intuitive yet precise control over your points, paths and shapes—without creating Effects or file incompatibilities across versions of Illustrator. VectorScribe lets you work with your vectors instead of around them.

I’ll go into detail about each tool in the suite later, but in the meantime have a look at some videos and check out the free 7 day trial.

Full disclosure: I was a volunteer beta tester for this software and received a complimentary copy.

VectorScribe by Astute Graphics – $119

Full disclosure: As a beta tester, I received a complimentary copy of this plugin.

How to Create an Isometric Grid in Adobe Illustrator

How to Create an Isometric Grid in Adobe Illustrator

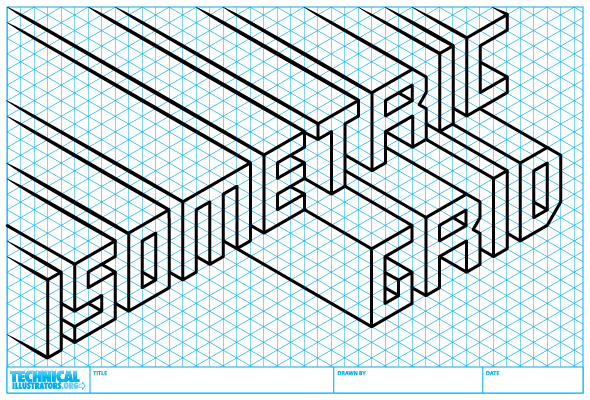
This is a very quick and easy tutorial for creating an isometric grid in Adobe Illustrator, which you can then either work directly over in Illustrator or print out for freehand sketching.

If you want to skip the tutorial and get working in isometric right away, download these completed grids in PDF format, ready for printing or import into Illustrator or Corel:

Read More

Animation Resources for Technical Illustrators

httpvhd://www.youtube.com/watch?v=1Xhdy9zBEws

If your new year’s resolution was to learn how to bring your illustrations to life with motion and interactivity, you are in luck. Below I’ve gathered some resources, tutorials and inspiration to get you started on your journey.

Adobe Flash

For better or for worse, Flash has been around for 15 years. While rival technologies may be digging its grave, Flash remains the most intuitive animation tool for users of Adobe Illustrator — and 15 years worth of online tutorials and forum discussions make for an easy learning curve.

Both made by Adobe, Flash and Illustrator work pretty well together (although, not as well as you might expect). Like Illustrator, Flash is vector based and can import .AI vector artwork along with bitmaps and video files. Illustrator can export .SWFs for Flash, and later versions (AI CS3+) can even include symbols, animation clips and dynamic objects.

In addition to animation tools, Flash also has a programming language called ActionScript (AS) with which you can make your animations interactive. There are three versions of ActionScript (AS1, AS2, AS3) which are not cross-compatible, each more esoteric than the last. I find AS2 to be the right mix of natural-language programming and breadth of possibilities, and seems to have the most tutorials too.

Resources:

Create Flash Animations Entirely in Illustrator
Illustrate and Animate a Bouncing Ball
Kirupa – Flash & ActionScript Tutorials
AdobeTV – Learn Flash CS5 Professional

Adobe After Effects

AE is a beast of a program; it’s like the Photoshop of video. It’s used for 2D & 3D motion graphics, editing, compositing, post-production and special effects for video, TV and film. And like Photoshop it can be used to create entire projects from start to finish, but its real strength is in manipulating and compositing assets made by other means, such as Illustrator and 3D applications.

AE takes just about anything you can throw at it — AI, EPS, PSD, PNG, PDF, MP3, WAV, AVI, MOV, even camera movements from popular 3D software — and spits out a wide variety of video formats.

Although AE does allow you to control animations and effects with scripting, it only exports video meaning no interactivity with AE alone.

Resources:

Intro to After Effects
Build a Car Racing Scene from Photographs
Greyscale Gorilla – After Effects Tutorials
AE Tuts
AdobeTV – Learn After Effects CS5

Ai to Canvas

Ai to Canvas is a plug-in for Adobe Illustrator produced by developers at Microsoft. It enables Illustrator to export vector and bitmap artwork directly to a new HTML5 web element called a Canvas. Canvas-enabled browsers (latest versions of Firefox, Chrome, Safari, Opera) can then interpret and render that content for viewers.

The advantage over simply exporting images for the web is that artwork in a Canvas element remains vectored and can be animated and manipulated with JavaScript code. In fact, Ai to Canvas allows rudimentary animation simply by renaming your layers.

The fact that Canvas doesn’t rely on a browser plug-in (like Flash does) means that your animation & interactivity will run regardless of the viewer’s installed components. This means content presented in a Canvas element are viewable on Apple’s iPad, iPhone and iPod Touch, since they disallow browser plug-ins. I made this HTML5 demo to try it out.

Resources:

Ai to Canvas Plug-In for Illustrator
Ai to Canvas Samples & Documentation
Canvas Element Tutorials & Documentation

Use What You’ve Got

You don’t necessarily need a fancy program to create rich animated and interactive media. Photoshop is equipped with an animation palette suitable for creating flipbook type animations; Here’s a primer.

Failing that, try to be creative with the tools you have. Here are two web pages that feel animated, using only static assets:

Ben the Bodyguard
Lost Worlds Fairs: Atlantis

Have a tool or resource to recommend? Let me know in the comments and I’ll add it to our Resources page!

Adobe Illustrator Gripes & Feature Wishlist

I’m going to have the ear of 3-4 developers from Adobe’s Illustrator team sometime in the next few days. They want to know what makes our life difficult, and what would make it easier. What are your gripes, pain points, repetitive stress injuries? What is your dream feature? What are you accomplishing with plug-ins that should really be built in?

Let me know in the comments, or by editing the fancy Google Doc after the jump.

Read More

Illustrator CS5 – Perspective Grid

Adobe Illustrator CS5 - Perspective Grid

Adobe Illustrator CS5 - Perspective Grid

It’s that time of the year when we’re blessed/cursed with another release of Adobe’s Creative Suite software and the inevitable question of whether or not to upgrade. For those of you teetering on the edge, here’s the push you may need to break out the credit card.

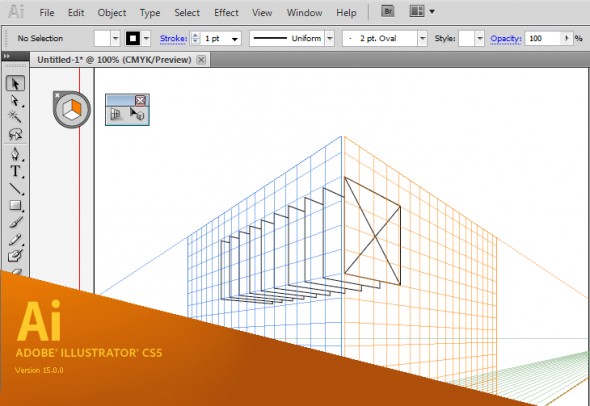
Brand new to  Illustrator CS5 is an embedded perspective grid and all the accompanying tools you’ll need to streamline your perspective drawing work flow. I was lucky to be part of the beta testing for this tool, along with fellow TechnicalIllustrators.org contributor Cody Walker, and I have to say I’m really pleased with how it turned out.

Anil Ahuja of Adobe has posted a tutorial that shows most of the features of the perspective grid. Have a look at it here. Check out the PDF at the bottom – it goes into more detail regarding how the tools are used. A sample of the file is there as well, but you’ll need a copy of CS5 to open it.

The grids come in default one-point, two-point and three-point perspectives, but you can tweak everything – vanishing points, origin, grid size, the height of the horizon and much more. When the grid is active, the shape tools all conform to a plane (chosen by you with the 1, 2 and 3 keys). Once objects are on the grid they can be copied and moved perpendicularly through the space as well.

However, for me the true power of this tools comes from the ability to transfer flat orthographic drawings directly to the grid. The only drawback is that raster images are not supported – only vector shapes can be applied to the grid.

The new tools will not obsolete or undermine our abilities as technical illustrators. Rather, as Anil states:

“…please understand that Perspective Drawing in Adobe Illustrator CS5 is NOT a 3-D environment. It is an extension of traditional perspective drawing technique. An artist will have a capability to define a perspective grid (one-point, two-point or three point), define a relative scale, move the grid planes and draw objects directly in perspective or attach flat art onto them by dragging with the new Perspective Selection tool.”

Also, all the old quirks of working with a grid are still there – so don’t throw out your techie toolkit just yet!

I highly recommend downloading and trying out the new version of Adobe Illustrator cs5. A 30-day trial is available on Adobe’s site.

Things you wish you would have learned long ago

I’ve been using illustrator now since oh version 1.4 or something and I think it’s crazy how I’m still always learning on it. For example, for some silly ass reason I never bothered to really get used to setting up symbol libraries and custom user profiles. Finally after all this time I set up a user profile with custom swatches and symbols that I use every time I start up a new document. What a time saver.

symbols

And then I find this gem in Computer Arts latest edition. Here’s a tip from Luke O’Neil on blending paths. Now I’ve used blending paths quite a bit but I had no idea you could shape them to a custom spline.

tip

05___ Creating blends between two objects is easy in illustrator. You draw 2 objects and go to Object>Blend>Make or, alternatively, specify the number of steps you’d like in the options box. It’s also possible to change the direction of the blend by simply drawing a path and, with the blend and path selected, going to Object>Blend>Replace Spine.

How about you, anything you recently discovered that you are kicking yourself in the ass for not using earlier?