How to Illustrate a Building in Isometric

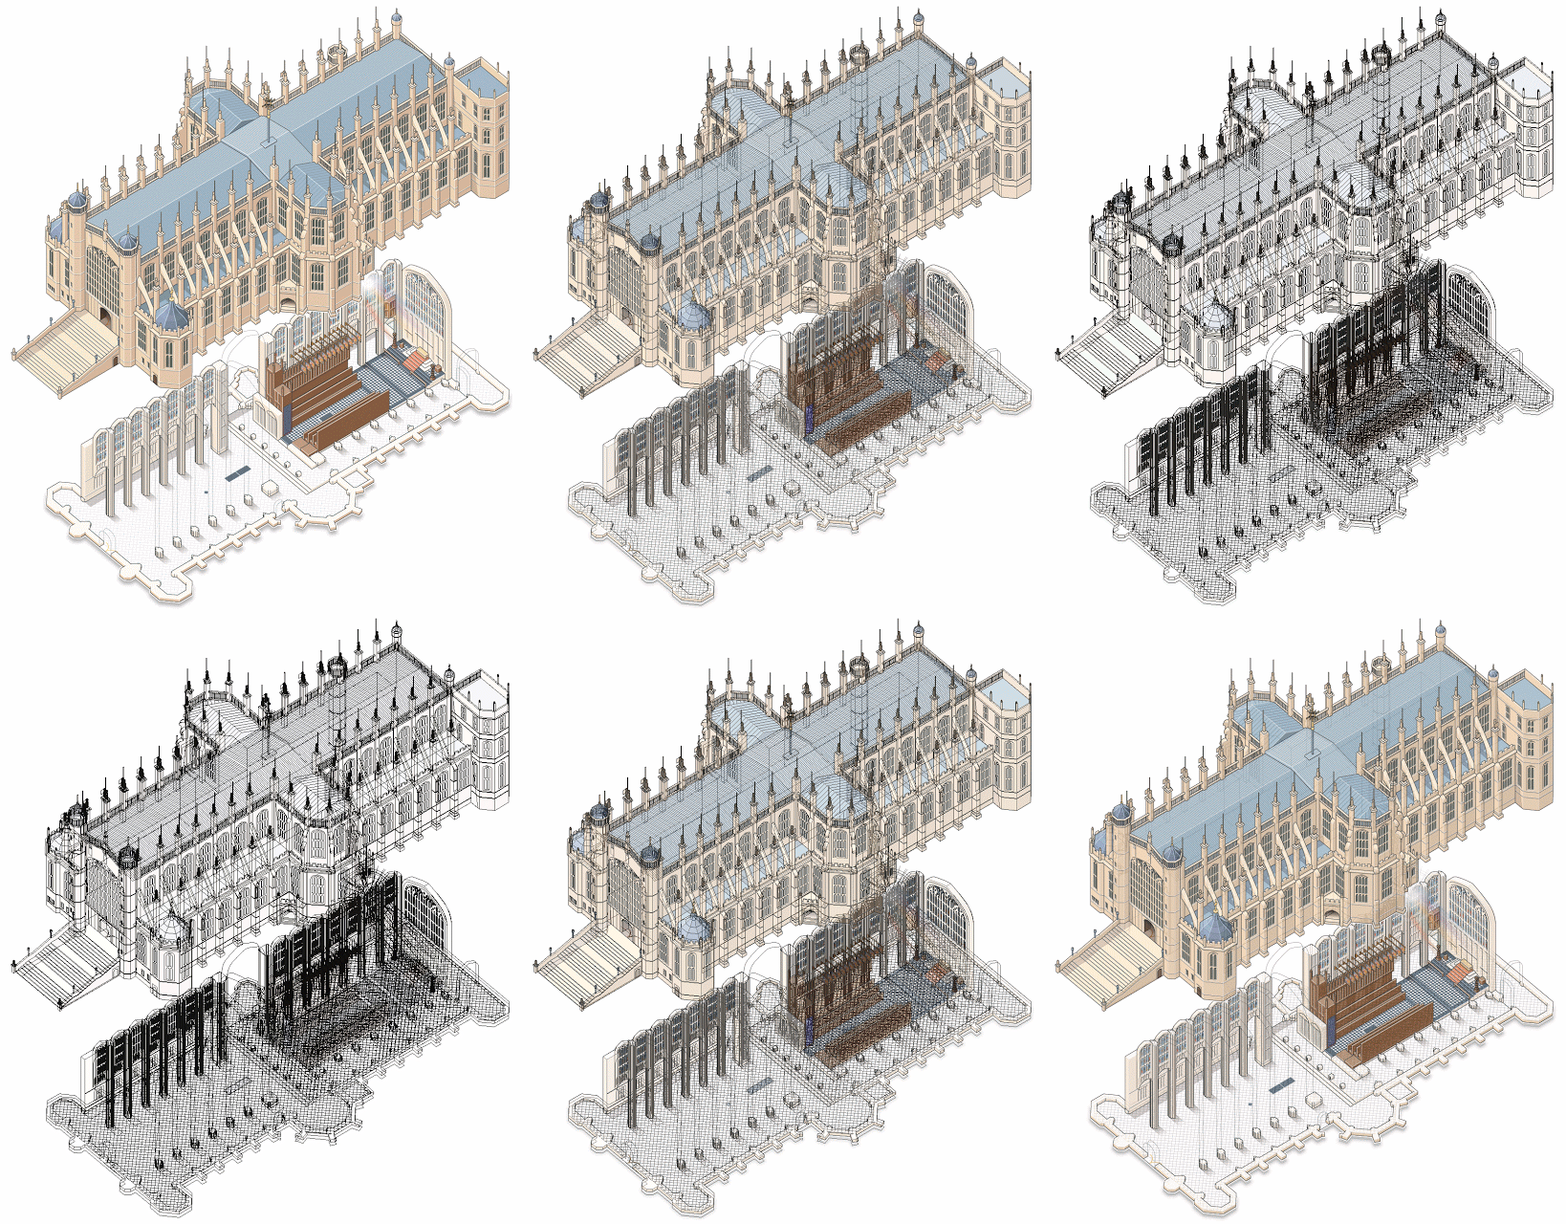
Infographic artist Ninian Carter, who previously shared with us his process for illustrating a smartphone, an ancient tomb, and a water bomber, has posted 100+ screenshots showing his process for illustrating St George’s Chapel on the grounds of Windsor Castle in Adobe Illustrator.

To create it, he relied on satellite imagery, copies of old plans, 360° panoramic photos and various tourist photos.

Check it out here.

Great work, Ninian!

Isometric Action Tutorial from Astute Graphics

Isometric Action Tutorial from Astute Graphics

Iaroslav Lazunov has a great isometric illustration tutorial for Adobe Illustrator on the Astute Graphics blog.

It’s similar to the scale-shear-rotate method we’ve talked about before. You start by drawing straight-on orthographic views of the top, front and side of the object, then distort each onto their respective isometric planes.

What’s cool about this technique is that it uses Graphic Styles to apply the distortion. This way the artwork stays dynamic, meaning you can edit the straight-on flat projections to update the isometric version. They also use Astute Graphics’ Phantasm plugin to apply shading to each plane at the same time.

This technique would be really handy if you had to create a large detailed locator map, especially if you might have to change the design of elements down the road.

Full disclosure: As a beta tester for Astute Graphics I receive complimentary products.

Isometric Cutaway Infographic Walkthrough

Isometric Cutaway Infographic Tutorial

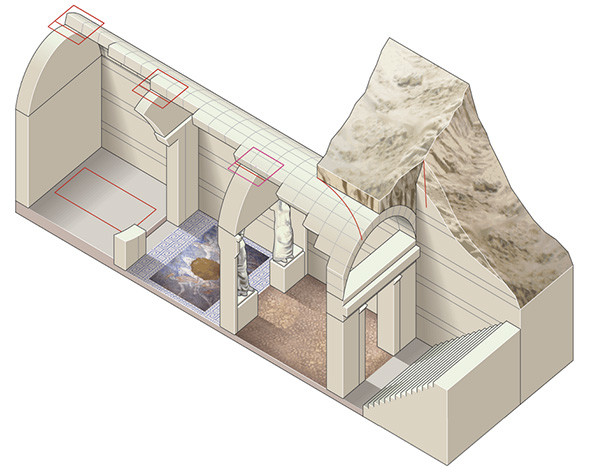
Ninian Carter has put together another a great step-by-step of his isometric illustration process, this time of a tomb dating back to the era of Alexander the Great. Like his isometric aircraft illustration, he makes great use of the Scale-Shear-Rotate technique. The Live Traced textures really bring this one to life!

The illustrated elements were then taken into Adobe Edge to add some animation and interactivity.

Thanks for sharing, Ninian!

Some Perspective on Perspective Drawing

What we see versus what we think we see

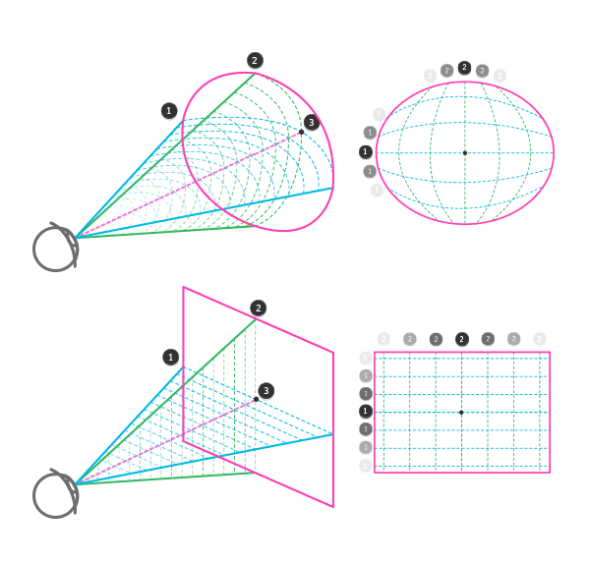
If you’re struggling to learn perspective drawing, or even if you use it every day but never thought about it too deeply, I suggest you read Live Perspective: A New Approach to Depth in Drawing over on TutsPlus.

It starts off with the fundamentals of sight, perception and experience, and goes on to tie together phenomenon such as distortion, parallax, peripheral vision, depth of field and the limits of linear perspective into a sort of unified idea about visually communicating three dimensional space.

Scott Robertson’s Free Tutorial Fridays

httpvh://www.youtube.com/watch?v=w4uJpHaHZTc

Scott Robertson is a concept artist well known for his educational books, DVDs and workshops. Every Friday he posts a free video tutorial to his YouTube page. He covers a wide variety of topics including sketching, inking, marker rendering and Photoshop painting. What I like about his videos is that they’re not strictly technical, he’s really good at explaining the thinking and process behind everything he does.

Adobe Illustrator Tutorial – Working with Live Paint

httpv://youtu.be/2SIfPn6AlCo

In an effort to contribute more to the site I thought I would experiment with creating short tutorial videos on tricks and tips for Adobe Illustrator. This one is dealing with how I use the Live Paint tool to create custom arrows. Thanks to my friend Loren Brinton for the intro movie.

Let me know what you think in the comments or if you have suggestions on other videos you would like to see in the future.

Thanks.

Wrapping Patterns Around Cylinders

Wrapping Patterns Around Cylinders

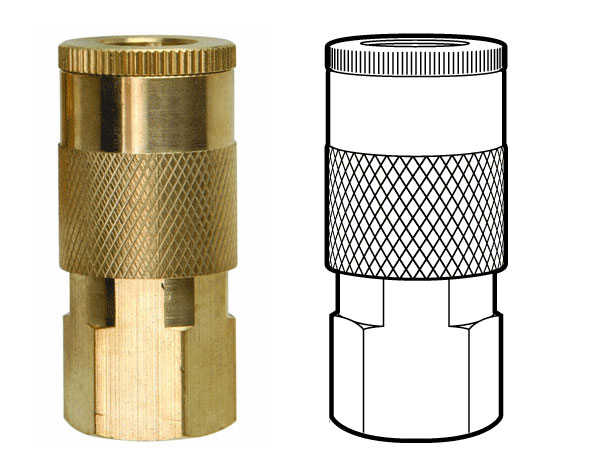
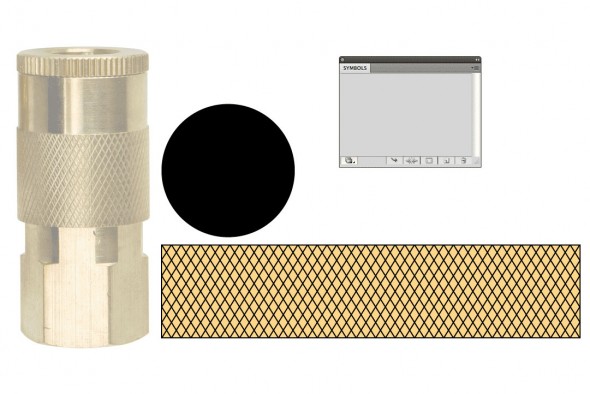
Brett wrote in looking for a way to accomplish a diamond grip pattern wrapping around a cylinder, like the one shown above. It’s easy enough to trace a photo, but what if you didn’t have one, or it wasn’t at the right angle?

The technique I’d use is similar to mapping a label to a can.

Wrapping Patterns Around Cylinders

1. Create the artwork you’ll need. The diamond pattern matches the angle and density of the original. The black circle is the same diameter as the reference part, and is filled with no stroke.

Wrapping Patterns Around Cylinders

2. Make the pattern a symbol. Drag the pattern into the Symbols palette.

Wrapping Patterns Around Cylinders

3. Extrude the circle. Go to Effects > 3D > Extrude & Bevel. Click the Surface dropdown at the bottom and select Wireframe. This will help you orient the cylinder to the desired angle. I usually start by entering 0° for all the rotation angles, then rotating one axis at a time by grabbing the edges of the preview cube.

You may need to reposition your cylinder to line up better with a reference image. To do this, Click OK, move the cylinder as needed, then open your Appearance pallete and double click on the 3D Extrude & Bevel item. You may need to turn Preview back on.

When you’re happy with your geometry, click Map Art…

Wrapping Patterns Around Cylinders

4. Map Art. Click through the Surfaces to find the rectangular side surface. Then select your pattern from the Symbol drop down. Next, select Scale To Fit at the bottom and check off Invisible Geometry. Click OK.

Wrapping Patterns Around Cylinders

5. Change Surface to Flat Shading. Click OK. You can now edit the artwork as needed by going to Object > Expand Appearance. In my example, I changed the yellow fill to white, then drew the rest of the lineart on another layer.

Have a common problem in Illustrator? Let us know in the comments, or email it to suggest@technicalillustrators.org!