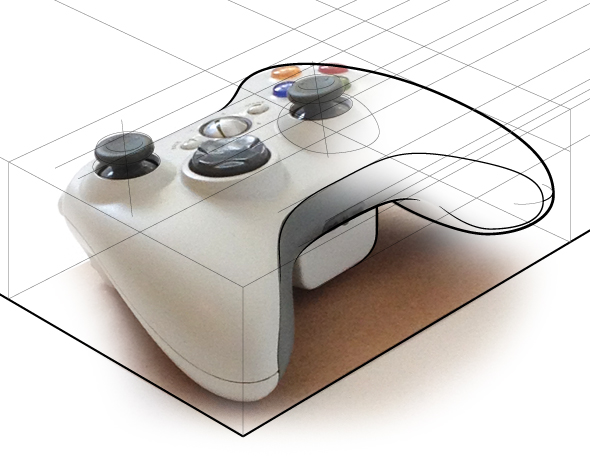
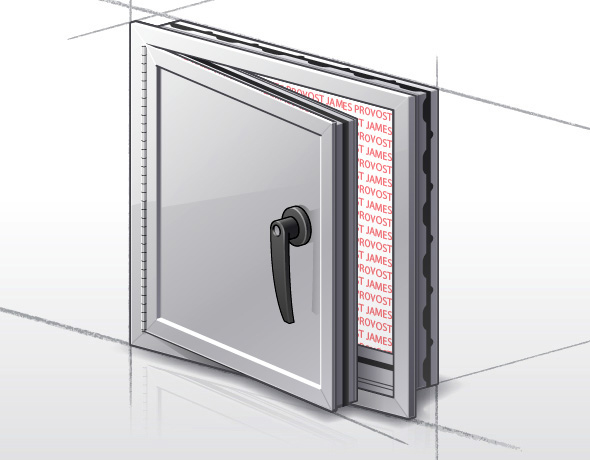
Jim Hatch recently completed this great project for Volkswagen, featuring finely detailed and rendered cutaway illustrations of their entire vehicle lineup. After the break, he shares some insight on working on a project of this scale, some process work, and lots of beautiful final illustrations.
Masters of the Cutaway
I just happened across design blog Core77‘s ongoing series, Masters of the Cutaway. Some of it seems lifted from Kevin Hulsey‘s much more in-depth Masters Gallery: Art of the Cutaway, but there are a few illustrators you might not know about:
Wrapping Patterns Around Cylinders
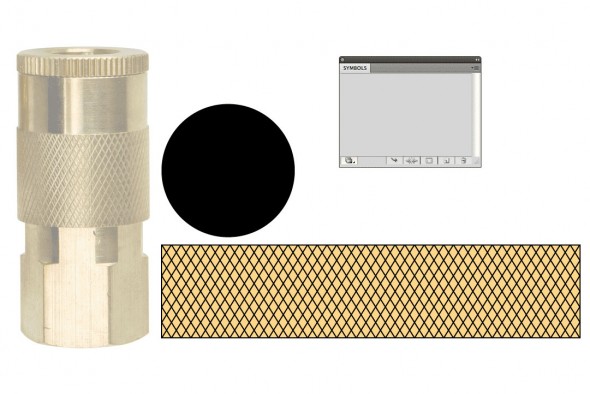
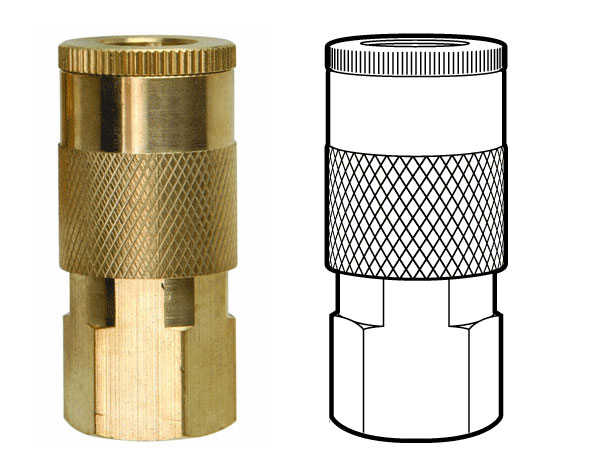
Brett wrote in looking for a way to accomplish a diamond grip pattern wrapping around a cylinder, like the one shown above. It’s easy enough to trace a photo, but what if you didn’t have one, or it wasn’t at the right angle?
The technique I’d use is similar to mapping a label to a can.
1. Create the artwork you’ll need. The diamond pattern matches the angle and density of the original. The black circle is the same diameter as the reference part, and is filled with no stroke.
2. Make the pattern a symbol. Drag the pattern into the Symbols palette.
3. Extrude the circle. Go to Effects > 3D > Extrude & Bevel. Click the Surface dropdown at the bottom and select Wireframe. This will help you orient the cylinder to the desired angle. I usually start by entering 0° for all the rotation angles, then rotating one axis at a time by grabbing the edges of the preview cube.
You may need to reposition your cylinder to line up better with a reference image. To do this, Click OK, move the cylinder as needed, then open your Appearance pallete and double click on the 3D Extrude & Bevel item. You may need to turn Preview back on.
When you’re happy with your geometry, click Map Art…
4. Map Art. Click through the Surfaces to find the rectangular side surface. Then select your pattern from the Symbol drop down. Next, select Scale To Fit at the bottom and check off Invisible Geometry. Click OK.
5. Change Surface to Flat Shading. Click OK. You can now edit the artwork as needed by going to Object > Expand Appearance. In my example, I changed the yellow fill to white, then drew the rest of the lineart on another layer.
Have a common problem in Illustrator? Let us know in the comments, or email it to suggest@technicalillustrators.org!
Shooting On-Angle Photos
Often the most difficult and time consuming part of technical illustration is finding good reference material. While the internet serves up a limitless selection of images, finding one at an appropriate size, fidelity, viewing angle, and unambiguous copyright status, can be next to impossible.
Sometimes it’s much quicker to simply step away from your desk and go snap a photo of whatever you need. Of course, this isn’t practical if you’re drawing a submarine or a satellite, but it can help if you’re trying to fill a scene with commonplace objects.
Where it gets tricky is matching your photo reference up to the rest of the drawing. We’ve all seen drawings badly traced and assembled together from photos taken at different angles. We can recognize this because we understand perspective. So let’s apply that understanding when shooting our own photos.
Create Proper Gears & Conical Gradients
Iaroslav Lazunov has a great tutorial over on Astute Graphics’ blog on how to create proper gears in Adobe Illustrator. This tutorial makes use of the plugin VectorScribe, but the same results could be achieved with Illustrator’s default tools with some extra steps.
An important distinction is made here: Proper Gear. Most gears that show up in illustrations and icons would not work with any efficiency and some would just shred to bits. While you wouldn’t necessarily 3D print these and use them, you’ll end up with something that at least looks like it would work (unlike the failboat below).
Also included in the tutorial is a way to accomplish conical gradients in Illustrator (unfortunately the technique is extremely convoluted).
The Business of Freelancing Creative
Peter Beach, a technical illustrator with over 25 years of freelance experience, wrote in to share his blog The Business of Freelancing Creative. There Peter has a wealth of wisdom, including his 21 Practical Tips to a successful illustration career, and candid essays on finding your niche, work-for-hire, copyright, pricing and stock illustration.
I’ve only started reading through, but it’s already proving to be a valuable resource for those considering a career of freelance and seasoned professionals alike.
If you have a site or resource to share, please visit the Suggest page.
The Complete Technical Illustrator eBook
Greg Maxson just announced that his book The Complete Technical Illustrator [previously] is now available for purchase as a PDF eBook:
Originally published internationally by McGraw-Hill, this 500-page full-color text is a comprehensive look at vector-based technical illustration. Several software products are featured including Adobe Illustrator and Autodesk’s AutoCAD and 3ds Max, but the procedures and approaches are easily transferred to CorelDRAW, inkScape, Maya, and Blender, among other graphic tools. This text also features numerous illustration tips and case studies of illustration taken directly from business, industry, and commerce. Written in a conversational manner and full of explanations, The Complete Technical Illustrator is a welcome addition to your illustration resources.
Dr. Jon M. Duff has written about and taught technical illustration for forty years and is Professor Emeritus of Engineering at Arizona State University. Greg Maxson has been a professional technical illustrator for over two decades and operates his own studio in Urbana, Illinois.
The Complete Technical Illustrator by Greg Maxson & Jon Duff [$20]
Vector Scribe Illustrator Plugin
httpvh://www.youtube.com/watch?v=Y1TEqhiyZ3k
I’m excited to introduce to you a new plugin suite for Adobe Illustrator, VectorScribe by Astute Graphics.
VectorScribe fills the gaps in Illustrator’s toolbox. These tools give you intuitive yet precise control over your points, paths and shapes—without creating Effects or file incompatibilities across versions of Illustrator. VectorScribe lets you work with your vectors instead of around them.
I’ll go into detail about each tool in the suite later, but in the meantime have a look at some videos and check out the free 7 day trial.
Full disclosure: I was a volunteer beta tester for this software and received a complimentary copy.
VectorScribe by Astute Graphics – $119
Full disclosure: As a beta tester, I received a complimentary copy of this plugin.
Style versus Communication
I’ve been meaning to write about style — the design and arrangement of visual elements that creates a tone or voice in an illustration, throughout a project, or across an illustrator’s entire body of work. More specifically, how style conflicts and complements with a technical illustrator’s role of visual communication.
This critique of dozens of newspapers’ adaptations of an Associated Press graphic serves as a great introduction to the topic. News graphics veteran Charles Apple dissects the minute decisions made by the various papers’ editors in the name of visual appeal, visual communication, story telling and branding.
Is technical illustration more about visual communication or style?
How do you compromise between the two?
[A Look at Tuesday’s Graphics-Heavy bin Laden Presentations]
How to Protect Your Images with Metadata
There is little you can do to stop someone who is determined to steal your images. Watermarks are easily removed and website scripts are defeated with a simple screen grab. These attempts only mar your work and make your site difficult to navigate.
In this tutorial I’m not talking about protection from image thiefs, I’m talking about protection from lost opportunities. Times when your images are inevitably downloaded, blogged, cropped, reblogged, faved and saved, and end up orphaned on someone’s hard drive, ffffound, imgfave, tumblr, or email—especially when that person likes your work and would really love to hire you, if they could just figure out where the image came from.
This happens more often than you think; art directors are constantly grabbing images whenever and wherever they see them, but seldom have the time to organize them and make note of where they came from (they should really be using Evernote). Months or even years down the road they might find your image floating in a random folder, uselessly renamed li4tceEqMb1qe.jpg by Tumblr, your name & website address croppped by an ignorant blogger leaving TinEye with no results.
Wouldn’t it be great if you could tuck your name, website and keywords and copyright information into every image to avoid this situation? You can—using Metadata.
Metadata is data about data—like the Created and Modified dates you see attached to every file on your computer. It’s like a little text file appended to files only adding a few bytes to the total file size. You might already be familiar with EXIF metadata added to JPGs by digital cameras, scanners and phones. The metadata I’m talking about in this tutorial is IPTC, but all you need to know is that by the end you’ll be able to embed your name, website, email, phone number, address and copyright into every image—automagically.